Key Takeaways:
- Ourdream makes video creation surprisingly simple. You can go from an idea to a polished clip in minutes—just choose your character, scene, and action, and let the AI do the rest.
- You can pick between multiple video modes, aspect ratios, and quality settings, so your content always looks sharp and fits perfectly wherever you share it.
- Once you step into the premium version, things get exciting—custom prompts, ultra-realistic visuals, and even uncensored creative freedom.
Ourdream Video Generator Test
We went through still images for a reason (you can check what I found here). With video, I’m hoping to see how well Ourdream maintains “humanness” when the model is placed in motion. I’ll describe what I’m looking for as we go through the two test videos, but first, let’s talk about the character I’m testing.
The character is the same as the one I used for the image generation tests. A young woman with short hair and expressive features. Here are the videos and my thoughts on them.
Video 1: Just me moving naturally on camera
In this first video, I see quite a bit of restraint in the movement. That’s a good thing. I see a bit of a head cock, slight facial expressions, breathing. I don’t see anything that suggests an attempt to do too much. It doesn’t seem like the AI is trying to show off. That’s a step in the right direction.
I didn’t give any extreme prompts for this video. I just wanted to see how Ourdream handles the movement of the model without much direction. As I watch the video, I’m looking for a few things. Is the facial movement natural? Do the eyes appear to have life behind them? Is she breathing?
What I notice pretty quickly is restraint, and that’s a good thing. The movements are small, almost shy. A slight head tilt, soft facial shifts. Nothing screams “look what I can do,” which honestly makes it more believable. It feels like the AI knows when not to overact, and that alone puts it ahead of a lot of tools I’ve tested.
Video 2: A quick, natural reaction on video
I still want to see if she appears natural and lifelike, but I also want to see more expression and emotion. I want to see if Ourdream can maintain a consistent personality for this model from one video to the next. I’ve found in the past that AI video models can be a bit of a crapshoot in this regard.
In this video, I’m looking at the posture of the character. I’m looking for confidence in her movements. I want to know if she seems aware that someone is looking at her. Does she seem comfortable with the attention or does she seem stiff?
From what I can tell, she seems mostly the same. She doesn’t seem to have any radical departure from the personality suggested by the first video. She still seems mostly confident and self-assured, and she seems mostly comfortable with the fact that someone is watching her. She doesn’t seem stiff at all. A bit reserved, perhaps, but mostly relaxed.
Overall Thoughts on the Video Tests
I’m not expecting perfection at this point. I just want to see if the AI can continue the illusion with video. Many video AI models fail miserably at this point. Here’s my overall impression of Ourdream’s video performance: it’s controlled.
There’s a bit of imperfection to the movement, but it’s mostly a “human” sort of imperfection. It’s calming. It doesn’t feel forced or wrong. I’m surprised at how well this turned out. There are certainly ways in which it could be improved, but overall, I’m actually a bit impressed with this AI video model.
If you liked the result, below you can see how to create a video with Ourdream.
Ourdream AI Video Generator User Guide
Here is how to create videos using Ourdream Video generator:
1) Start a Video & Pick the Character (required)
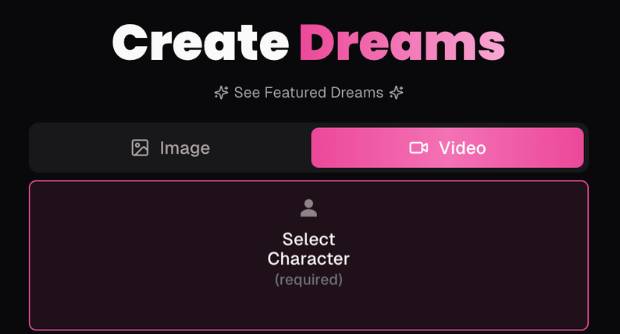
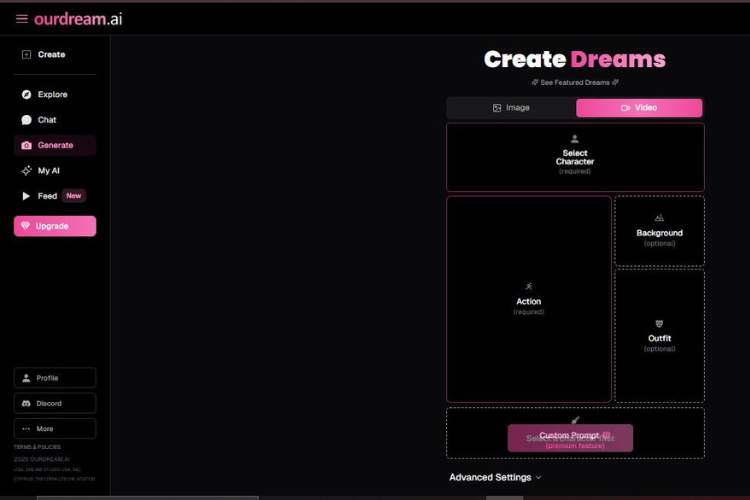
- Create Dreams: You’re on the creation hub.
- Tabs: Image | Video: Click Video (pink). If you ever want a still image instead, switch to Image.
- Select Character (required): Click the big card to choose who stars in your video.
- You’ll typically see a gallery or a search—pick one.
- Tip: If characters have variants (hair, style), choose the one that best fits your scene; it influences the model’s look and motion downstream.
(Optional) See Featured Dreams at the top for inspiration.
2) Define the Scene: Action, Background, Outfit

You’ll see a 3-panel layout: one large required picker on the left and two optional pickers on the right.
- Action (required) — the core motion or behavior for your clip (e.g., walking, waving, dancing).
- Click to open the action library and select exactly one.
- This choice drives most of the motion you’ll get; pick the closest match to your intent.
- Background (optional) — set the environment.
- Useful for context (studio, street, beach, etc.).
- Leave blank if you want a neutral or auto-generated backdrop.
- Outfit (optional) — wardrobe for the chosen character.
- Great for consistency across multiple videos, or to match brand colors/themes.
Pro tip: Locking Background and Outfit while you iterate on different Actions helps you quickly compare motions without changing the look.
3) (Optional) Add a Custom Prompt ✨

- Custom Prompt (premium feature) — a free-text box to further steer style and details (tone, camera feel, lighting, era, etc.).
- Examples:
- “cinematic, soft daylight, shallow depth of field, gentle camera pan”
- “neon cyberpunk alley, rain reflections, handheld feel”
- Keep prompts concise and unambiguous. Avoid conflicting instructions (e.g., “bright sunlight” and “moonlit night” together).
- Examples:
If you don’t have Premium, skip this—your Character + Action + (Background/Outfit) are enough to generate.
4) Output Settings → Generate
Dial in how many clips you want, the quality, shape, and length—then render.
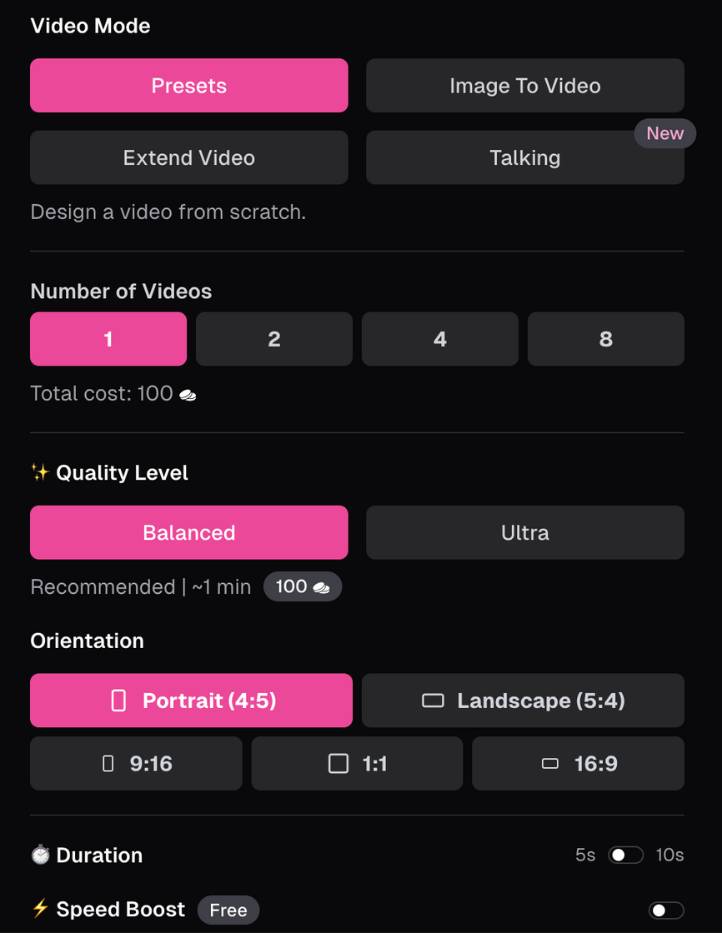
Video Mode
- Presets: The default “design from scratch” path using your selections above.
- Image To Video: Animate a still image you provide (great for bringing photos to life).
- Extend Video: Grow an existing clip (continue the scene).
- Talking (New): Optimized for speech/lip-sync style videos.
If you’re following this 4-step flow from scratch, stick with Presets.
Number of Videos
- Buttons 1 / 2 / 4 / 8.
- The UI shows a Total cost (e.g., “100” with a credit/seed icon). More outputs = higher cost but more variety.
Quality Level
- Balanced (Recommended) — best speed-to-quality trade-off; UI shows an approximate cost badge (e.g., “100”).
- Ultra — higher fidelity and detail; expect higher cost and potentially longer render time.
Orientation (Aspect Ratio)
- Portrait (4:5) and Landscape (5:4) highlighted; also 9:16, 1:1, 16:9.
- 9:16: TikTok/Reels/Shorts
- 1:1: Square feeds
- 4:5: Instagram feed-friendly portrait
- 16:9: YouTube/desktop
Duration
- Toggle 5s or 10s. Shorter is faster and cheaper; longer shows more motion.
Speed Boost
- Speed Boost (Free) switch: prioritize your job in the queue for faster delivery (at no extra credit cost, per label).
When everything looks right, click the Generate/Create button (label varies) to render. You’ll see progress and then a playable result.
Practical Tips for Best Results
- Action first: If the motion isn’t right, no background or outfit will save it. Nail the action, then style it.
- Stay consistent: For a multi-clip series, lock Orientation, Background, and Outfit so your feed looks cohesive.
- Balanced vs Ultra: Start Balanced to explore ideas. Switch to Ultra for final selects.
- Prompt hygiene: If using Custom Prompt, avoid contradictions and keep it under ~2–3 sentences.
- Platform targeting: Choose aspect ratio based on where you’ll publish; this avoids cropping later.
- Budget awareness: Watch the credit/seed badges near Number of Videos and Quality before generating batches.
Troubleshooting
- Generation fails or looks off: Try a simpler Action, remove Custom Prompt, or switch to Balanced.
- Weird background/object warping: Set an explicit Background and reduce prompt complexity.
- Lip-sync not matching: Use Talking mode for voice-led clips.
- Cuts off early: Increase Duration to 10s or choose an action with clearer start/finish.
OurDream Video Price
Ourdream video price seems confusing at first, but then it’s pretty straightforward. The price for a 5 second video is 100 coins. Regardless if you generate a video or chat video, the price will be the same. If you want more? That is simple. Each 5 seconds costs 100 coins. So 10 seconds costs 200 coins, 15 seconds costs 300 coins, etc.
Before you generate the video, you can see how much you will pay. Max is 60 seconds. This seems fair. Enough to play around, but not so much you can waste a lot of coins. It’s easy, simple and less complicated than a lot of credit systems.
Ourdream Video Comparison
| Feature | Ourdream Video Generator | Candy AI Video Generator | Mydreamcompanion Video Generator |
|---|---|---|---|
| Video length | Up to 60 sec | Short clips | Short clips |
| Pricing logic | +100 coins / 5 sec | Credit-based | Credit-based |
| In-chat videos | Yes | Limited | Limited |
| Motion realism | High | Medium | Medium |
| Control level | High | Basic | Basic |
What else can I do with Ourdream?
Video generation is the main attraction, but that is not everything you can do. I often find myself going from one feature to another, without even realizing it. I generate images because I want to see something, I go to chat because I’m interested to see how she reacts, and I go to audio because I want to hear something.
Then there is the girlfriend creator. It’s simple, yet it ties everything together. You can customize her appearance, voice, chat and growth. Sometimes I play with the look of my girlfriend, sometimes with chat, sometimes with voice. This is what makes it feel like less of a one trick pony, and more of a fun sandbox. Don’t feel like video today? No problem. There are other things you can do.
Human-Tone Take
Think of it like being at a sketchpad rather than a factory. You’re sketching out a fantasy, and the AI—techy but oddly reflective—renders it in motion. The guide walks you through it, gently, like a friend whispering, “Go ahead, add more detail or tone.”
You might get a little inconsistent results sometimes—depending on how wild your prompt is—but every misfire feels like a funny tangent in a conversation, not a rejection.
Free vs Premium Realness
Free tier? You could maybe get a simple video, but it’s fuzzy, limited. Uncensored detail usually shows up if you’ve got Premium: full prompts, richer character nuance, higher fidelity, and yes—adult or erotic scenes become possible without fearing “censorship.”
Once you’re in the premium realm, the visuals stand out: smoother, sharper, more emotionally charged. The guide even says if you want fully NSFW visuals, details are your tool—just feed them in.
Browse Ourdream Video Generator
Final Word (Imperfect and Human)
- Yes, uncensored AI video generation lives here—if you’re willing to define your vision clearly.
- The interface doesn’t shout “adult only,” but it doesn’t stop you either.
- Free-only scrapes the surface—premium delivers depth, clarity, and the kind of visuals that feel singular to your imagination.
- If creative freedom without filters is your jam, this is worth exploring—but tread smart and stay ethical.
- I can help sketch your first adult-scene prompt or walk you through premium features whenever you’re ready—no lecture, just real talk.
You’re not just pressing “Generate Video,” you’re drafting a scene—digitally, privately, personally. And that’s what makes it compelling.