When people talk about AI image generators, the conversation almost always drifts toward one topic—can it handle NSFW content? That curiosity is what led me to take a closer look at SoulGen’s Inpaint tool.
The site has been making waves for its anime and realistic character generation, but the real question on everyone’s mind is whether it can deliver when you want something more daring, more intimate, more adult.
I went in with that exact lens: not just “what does the tool do,” but “how far can it actually go if you’re looking for NSFW image generation?
- The site advertises text-to-image generation, letting you create characters—both anime-style and photorealistic—from descriptions. You can inpaint: upload or select an image, then use text to add, extend, or remove content.
- It allows uploading reference photos to make likenesses or faces lookalike.
- You can choose between anime and real-girl styles. Features include editing, outpainting, and even video generation.
Soulgen Image Generator – In-Depth 2-Step User Guide (Edit → Extend)
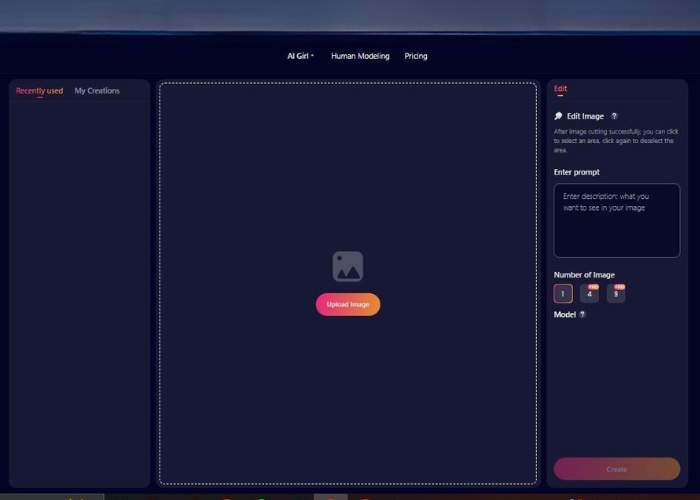
This tool turns one uploaded photo into fresh AI images in just two steps. The left side is your canvas & preview; the right side is your controls with two tabs: Edit and Extend.
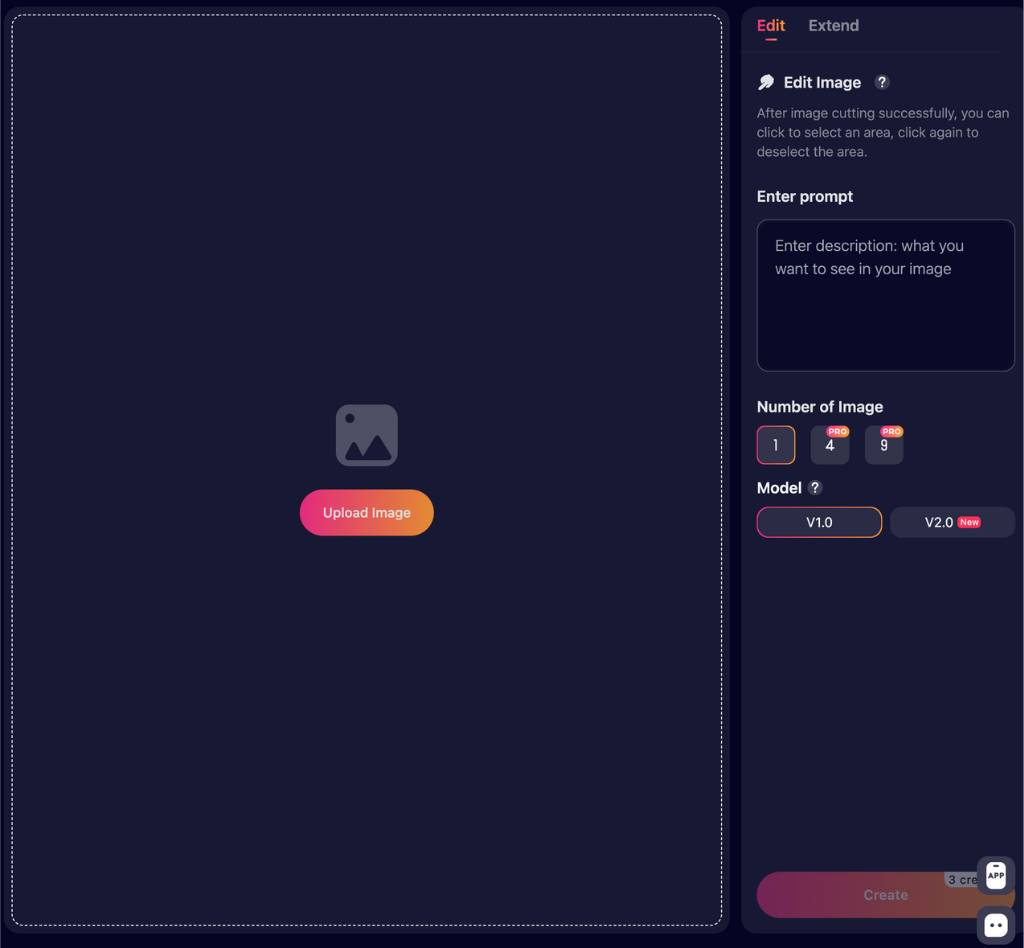
Step 1 — Edit (crop/mask + transform)
Where: Edit tab (top-right)
What you see & what it does
- Upload Image (center button): Loads your base photo onto the canvas.
- Edit Image (tool tip): After “image cutting” (masking) succeeds, click on the image to select an area you want the AI to modify; click again to deselect.
Use this to local-edit outfits, backgrounds, objects, etc. - Enter prompt (textbox): Describe exactly what you want (style, subject, mood, lighting, camera, colors).
Example: “cinematic portrait, soft window light, shallow depth of field, Kodak Portra look.” - Number of Image: Choose 1, 4 (PRO), or 9 (PRO) results per run.
- Model: Pick V1.0 or V2.0 (New). If results feel off-style or too literal, switch models and rerun.
- Create (bottom): Generates your outputs. (If your workspace shows credits near the button, this run will consume them.)
Recommended flow
- Click Upload Image and select your photo.
- (Optional) Use Edit Image selection to mask only the parts you want changed.
- Describe the goal in Enter prompt. Be concrete (who/what), then add style details (how).
- Pick Number of Image (more variations = broader exploration; PRO needed for 4/9).
- Choose a Model (start with V2.0 if offered; try V1.0 if you want a different vibe).
- Hit Create and review the result(s) on the left preview.
Pro tips
- Mention what to keep: “keep original face and pose; replace background with neon Tokyo street.”
- Add negatives if useful: “no text, no watermark, no extra fingers.”
- For local edits, keep the mask tight around the area you want changed.
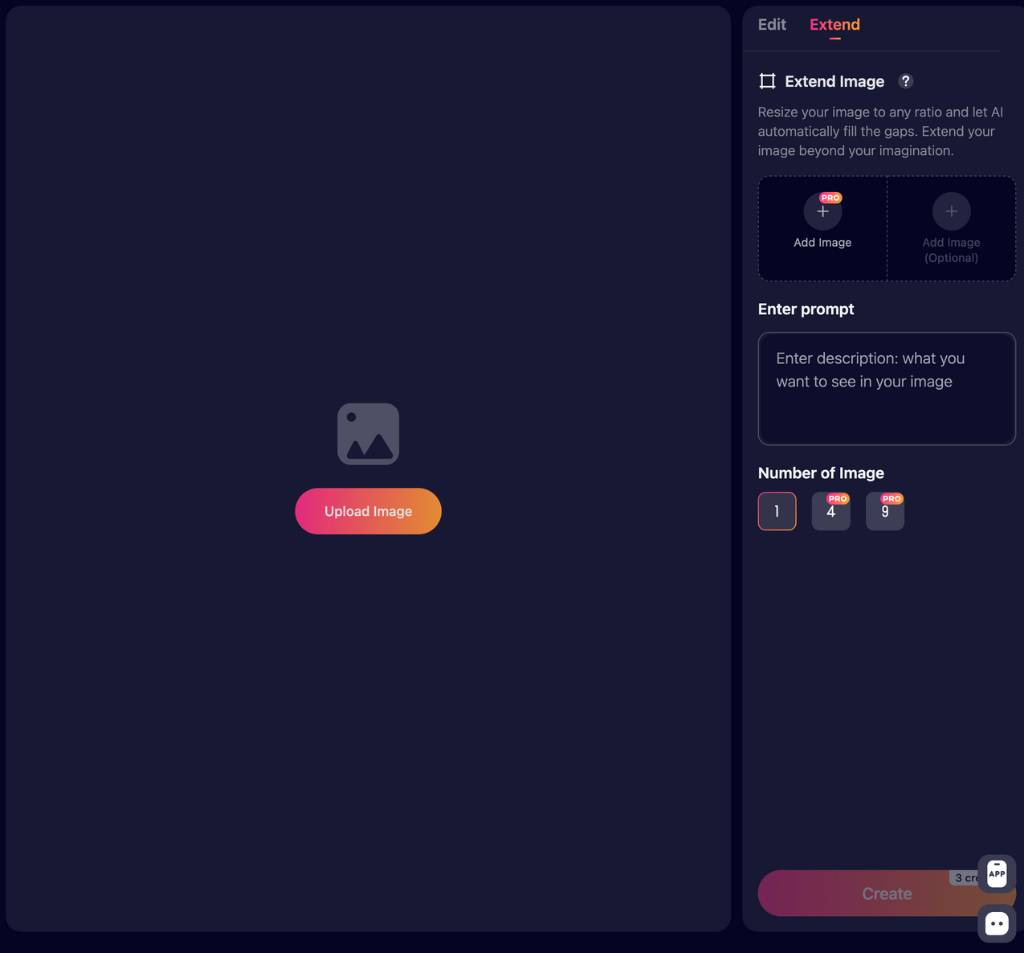
Step 2 — Extend (smart outpainting / new aspect ratios)
Where: Extend tab (top-right)
What you see & what it does
- Extend Image (tool tip + description): Resizes your image to any ratio and lets AI fill the new empty areas seamlessly (aka outpainting).
- Add Image: Choose the base image you want to extend.
- Add Image (Optional): Add a second image as an extra reference (optional). Useful when you want the extended parts to echo another style or scene.
- Enter prompt (textbox): Tell the AI what should appear in the newly added space and how it should blend with the original.
- Number of Image: Again choose 1, 4 (PRO), or 9 (PRO) variations.
- Create: Generates extended versions at the new size.
Recommended flow
- Go to Extend and click Add Image (or use Upload Image on the canvas) to load your base.
- (Optional) Click Add Image (Optional) to guide the look of the extended area.
- In Enter prompt, specify the desired composition and surroundings for the extra space.
Example: “widen to 16:9, continue the beach shoreline with gentle waves, golden hour sky, matching lighting.” - Choose Number of Image, pick your Model, then click Create.
- Review your extended images; rerun with refined prompts if edges or lighting don’t match perfectly.
Pro tips
- State the target ratio or framing: “square 1:1,” “banner 16:9,” “vertical 4:5 for Instagram.”
- Match lighting & perspective in your prompt: “same midday sun, same camera angle.”
- If seams are visible, re-extend with a prompt that emphasizes blend, same texture, and matching color temperature.
Prompt cheat-sheet (copy/paste & tweak)
- Styling: “cinematic, soft rim light, high dynamic range, natural skin tones, film grain.”
- Scene control: “background: minimalist studio in warm beige; add soft shadows; keep outfit unchanged.”
- Negative cues: “no text, no logos, no extra limbs, no blur.”
- Extend cues: “expand canvas to 16:9; continue cobblestone street with café tables and bokeh lights; seamless blend.”
Troubleshooting & FAQs
- Create button is dimmed: Ensure you’ve uploaded an image and entered a prompt (some setups require both).
- Edits affect the whole image: Use Edit Image to select only the region you want changed before generating.
- Weird artifacts at the edges (Extend): Add guidance like “seamless blend, consistent lighting,” or try the other Model and regenerate.
- Not enough variations: Choose 4 or 9 under Number of Image (PRO).
- Model choice? If results look too literal or off-style, switch between V1.0 and V2.0 and compare.
NSFW Capabilities: What’s Public vs. What’s User Reported
On Paper:
- Third-party write-ups (like GeniusFirms) say SoulGen is “designed to create lifelike or anime-style characters, often used for adult or fantasy content.”
- They mention control over clothing or lack thereof, implying can generate nude or erotic content.
In Reality (From Users on Reddit):
- Many users report that SoulGen has reduced NSFW access dramatically in recent months. Features like “remove clothes” were removed. If you try prompts for bikinis or thongs, it outputs modest outfits like tee shirts and knee-length shorts.
- Previously created explicit images have been blurred or blocked, even for paid users.
- High-level hints in guides suggest there used to be “dress removers” and nude options, but in practice, those are now ineffective or censored.
My Honest Take (Including Emotions and Why This Matters)
If you’re after NSFW image generation—nudity, erotic character art, or steamy edits—it’s complicated with SoulGen.
Yes, the site blurb makes it sound flexible: anime/realistic styles, text prompts, reference images, editing tools. Sounds perfect for creative personal fantasies, right?
Problem is, what’s advertised often doesn’t match what the tool currently allows. User reports suggest SoulGen is actively pulling back on NSFW features.
“Remove clothes” and bikinis are now censored, explicit prompts limited or blocked—even if you’re premium. That hurts trust. And older NSFW creations are being blurred or removed. That suggests moderation levels are high.
Emotionally, that’s frustrating. You go in pumped to create something bold or erotic, only to find your vision toned down. It feels like someone promised you a convertible and gives you a minivan instead.
Dive into Soulgen AI Image Generator
Should You Try SoulGen’s Inpaint for NSFW Work?
Maybe—but with low expectations. Here’s what I’d do:
- Test with milder prompts first: Try descriptive but not overtly erotic prompts (e.g., “figure with minimal beachwear in artistic lighting”) and see if those output anything.
- If that works, push slightly more: Try suggestive poses or partial nudity—not full-on pornographic—and analyze response.
- If you hit filter blocks or censored versions, that’s a clear sign the platform’s current stance is restrictive.
- Budget accordingly: Don’t pay for big token packs until you’ve tested boundaries.
- If you want consistent uncensored NSFW, consider trying other tools that explicitly advertise and allow that.
Topic | What You Need to Know |
| Features | Text-to-image; inpaint; styles (anime, real); reference upload; editing/outpainting |
| NSFW Past | Users say nude/dress-removal once existed, but now limited or removed |
| Current State | Strong censorship on explicit content; bikini/thong prompts yield modest clothing |
| User Sentiment | Frustrated; trust diminished; older NSFW blurred or taken down |
| Recommendation | Test cautiously; start mild; don’t assume full uncensored output |