I can guess your questions: “Does this thing even allow you to generate NSFW images at all?” and “Should I spend my time trying it?” Let’s discuss this like two humans who are learning to use something.
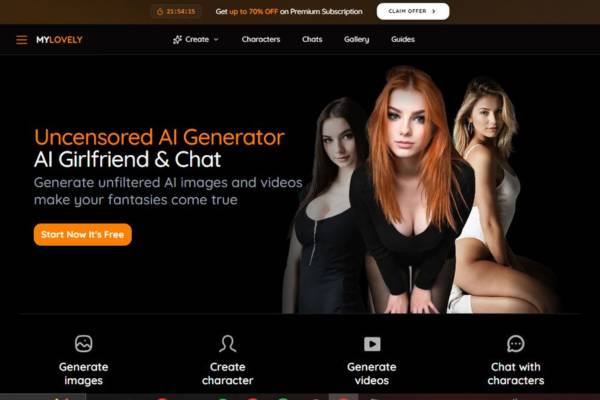
The site is about “uncensored” creation when you first go on it. The image creator is not hidden with disclaimers and “this-is-just-nsfw-and-totally-not-erotica” text and is offered as one of the default primary options on the site.
Their description seems to be about making images with the characters you make and that those images can be more than what you’d find with just a SFW image generator.
Now for the part that interests an adult content creator: it’s highly customizable. It isn’t a simple matter of typing in a prompt and getting something kinda close. Rather:
- Create a character profile based on any features and appearance you prefer.
- Specify the type of image you want or desired aesthetic to the AI.
- Use controls to control the appearance of the output.
That additional layer – in which you provide context in the form of character definition – is important, because it means the outcomes feel customized rather than canned, which is useful if you are looking for particular visuals related to a character or concept.
Here’s the step-by-step guide to generate AI girlfriend character:
Step 1 – access the Image Generator

Go to the homepage and click down on the page. You will see a massive section that says “Generate Stunning Images”. That is where you will start.
You should see a button that says Generate image — press that button.
You’ll notice a menu bar at the top with Create, Characters, Chats, Gallery, Guides, etc. It’s useful if you need to navigate later on.
You may also see a premium discount banner. You don’t need this to start, so simply continue with the start process.
Step 2: View the Gallery (if you selected it)
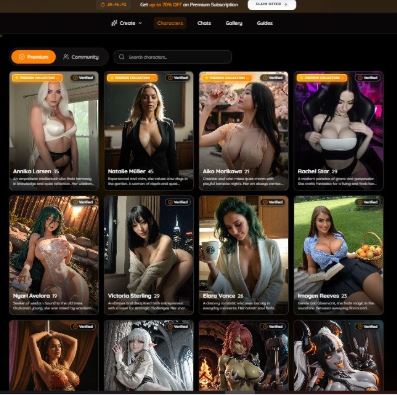
If you click Browse Gallery, a grid of community-made characters will be displayed.
A character card generally displays:
An image preview
The name and age
A brief summary
Occasionally, a tiny little “verified”
If you have a specific character in mind, you can use the search function to speed up the process.
If you like one of them, click on it. This will choose your character and return you to the generator.
Step 3 – Select a Character
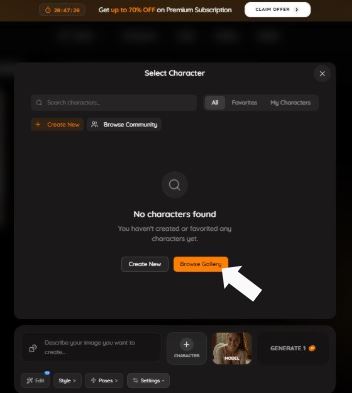
When you press Generate a “Select Character” box will appear.
Here is what you will observe:
- A search bar (if you have existing characters)
- For example, the various tabs: All, Favorites, My Characters, etc.
We have 2 main buttons:
- Create New
- View Full Gallery
If this is a new account, you will likely see “No characters found.” This is okay.
So, you are left with two options:
- Need something fast, off-the-shelf? Click Browse Gallery.
- Want a custom character? Hit Create New.
Step 4 – Invent a character of your very own or Create Your Character
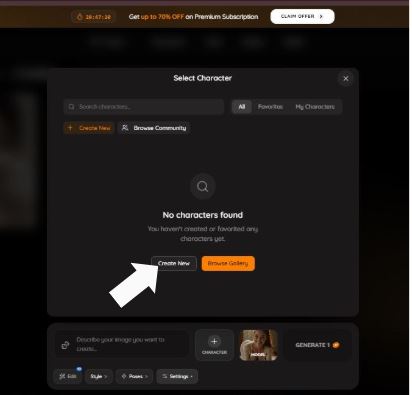
If you want to have full control, go back and select Create New.
You will now be redirected to a character builder page. Here you can create your character from the ground up.
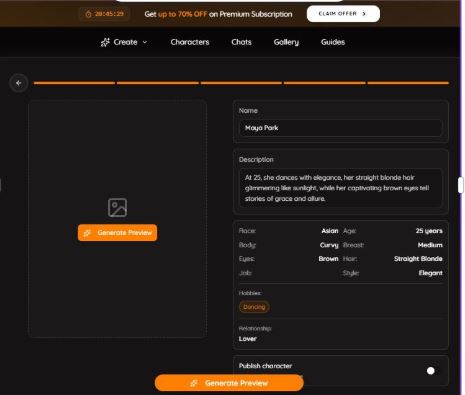
Creating your Own Charater
This page has two main sections.
On the left:
- preview box & “Generate Preview” button. You can see how your character will look like before creating actual image.
You’ll be asked to fill in your character information.
Here’s what you can personalize:
- Name – give them a name so you can easily retrieve them.
- Description — This should give a visual of what they look like and what type of personality they have. Be very detailed and precise.
Traits – You can set things such as:
- Age
- What is your Body type?
- Fur
- Why Eyes, you ask?
- Job
I don’t have personal style preferences, but I can suggest some options.
- Hobbies – This will shape the nature of photos down the line.
- Relationship — This impacts tone throughout the platform.
- Publish toggle: Whether the character should be private or public.
If all is well, click Generate Preview.
If you can’t get the preview to look as expected, refine your description and try again. Details matter here.
Step 5 – Output the Final Image
After you’ve chosen a character, check the bottom of the screen. This is where the image generation takes place.
You will observe:
- A prompt box that says something like “Describe your image you want to create…”
- A Characters button (if you want to change characters)
- A tiny thumbnail of the character you chose
- Big button labeled GENERATE (or GENERATE with a credit symbol)
Also there are small buttons like:
- Fashion
- Postures
- Settings
- Simple to start with:
- Write a concise prompt
If you have a specific design in mind, choose a style.
Only change your pose or settings if required.
Then press the button that says GENERATE.
And that’s it.
What if it doesn’t work?
Got a “No characters found” message? That’s because you haven’t made or chosen a character.
Does the Generate button look restricted? It could be that you’re currently using a free plan and have daily limits.
Does the image not resemble what you had in mind? Perhaps your description is not descriptive enough. Try adding more details.
It says on the website that it uses uncensored images, piquing interest. It suggests that you are not limited to “family friendly” content only, but as with all websites, it still has content guidelines based on legal and safe usage.
However, as compared to other popular generators, it is more geared towards allowing you to try out more adult themed content.
What I did like was the structure of the workflow, which at least doesn’t drop you in a sea of technical terms.
You click “create images,” and then it asks you to describe, in a way sort of outlining a figure in prose. It’s a nuance but a real one that you’re not simply pasting a raw prompt into a text box.
The question that will arise is “Does this really produce uncensored results?” If the descriptions available so far are accurate, yes – this is said to be intended for users who desire more free-wheeling results than most image generation AIs.
It’s often analogized to programs that allow you to configure characters and personalities before producing images, and is said to feel more “personalized.”
What I noticed too, and this is slightly subjective, is that the pitch seems to be speaking to the person who has used other image platforms and had their hands tied.
There’s a sense of assurance in the way they present the choices: like they’re saying, “Sure, go create whatever you like, we’re not going to restrict you to vanilla.” That’s important if you’re looking for a platform where you don’t feel so monitored.
Naturally, you can just do the free thing, too, so there’s no real need to commit before you try it out.
And for something like AI image generation tools, trying it out and seeing what happens with some sample prompts is definitely the best way to go about getting a feel for if you like the results it’s giving you.
Imperfect? Sure. You’re still gonna have to adjust prompts, fiddle with settings, and occasionally it’ll get it wrong.
But you can adjust the characters, control how the AI ‘sounds’ and that means the learning process is a lot less infuriating and more fun.
“I’ve used a few other similar tools in the past, and I think the most fun ones are the ones that you can sort of customize the character you’re creating.
And MyLovely.ai does that from the user’s point of view, which is why it’s fun if you’re looking to create adult images.”
In the event you’re the type of person who likes to experiment with different prompts, or different personality elements to see how that changes the look of things, this platform allows for that without trying to force you back into a “safety zone” over and over.
If you’re looking for a step-by-step guide on how to create a character and generate images, I can provide that as well.