GPTGirlfriend Image Generator is a tool designed to turn your imagination into vivid, personalized images with just a few words. Whether you’re crafting a playful anime-style avatar, a realistic portrait, or a dreamy fantasy scene, this generator bridges the gap between text prompts and stunning visuals.
It’s not just about creating art; it’s about giving shape to the characters and moods you want to interact with, making your AI experience feel more alive, immersive, and uniquely yours.
Visit GPTGirlfriendGPTGirlfriend Image Generator — Step-by-Step User Guide
I tested GPTGirlfriend image generator and decided to create this comprehensive guide of how to use it. Below is a complete walkthrough of the interface you shared, from first prompt to final review.
1) Write your Prompt (and Negative Prompt)
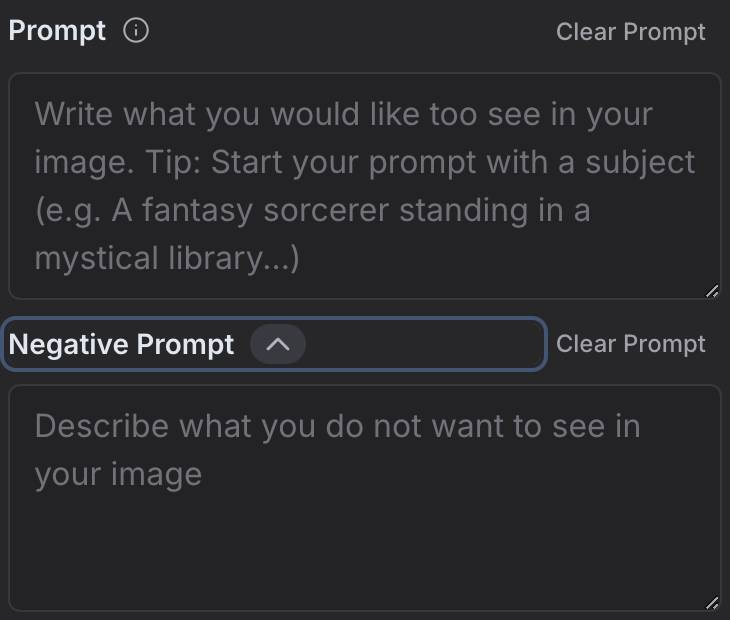
Where: Large text boxes titled Prompt and Negative Prompt
What to do:
- In Prompt, describe the subject → action → setting → details → style cues.
Example: “A traveler in a red raincoat crossing a misty suspension bridge at dawn, backlit, cinematic lighting, shallow depth of field.” - Open the Negative Prompt accordion and list things to avoid.
Useful starters: blurry, low-res, watermark, extra fingers, extra limbs, bad anatomy, text, logo, duplicate person, distortion.
Tips
- Keep one idea per sentence and move the most important words to the front.
- If you want a specific pose, clothing, or camera feel, name it: “3/4 view, softbox lighting, 85mm prime look.”
- If a detail keeps appearing that you don’t want, push it into Negative Prompt.
2) Set Auto-Enhance and Safe Mode (toggles)

Where: Two switches labeled Auto-Enhance and Safe Mode
How they help:
- Auto-Enhance: Post-processing pass that typically sharpens, balances exposure/contrast, and cleans artifacts. Leave on for polished results; turn off if you prefer the raw model look or plan to retouch elsewhere.
- Safe Mode: Enables content filtering. Keep on for general/brand-safe work. Only disable if you are certain the content complies with laws, platform rules, and your audience expectations.
3) Choose a Style
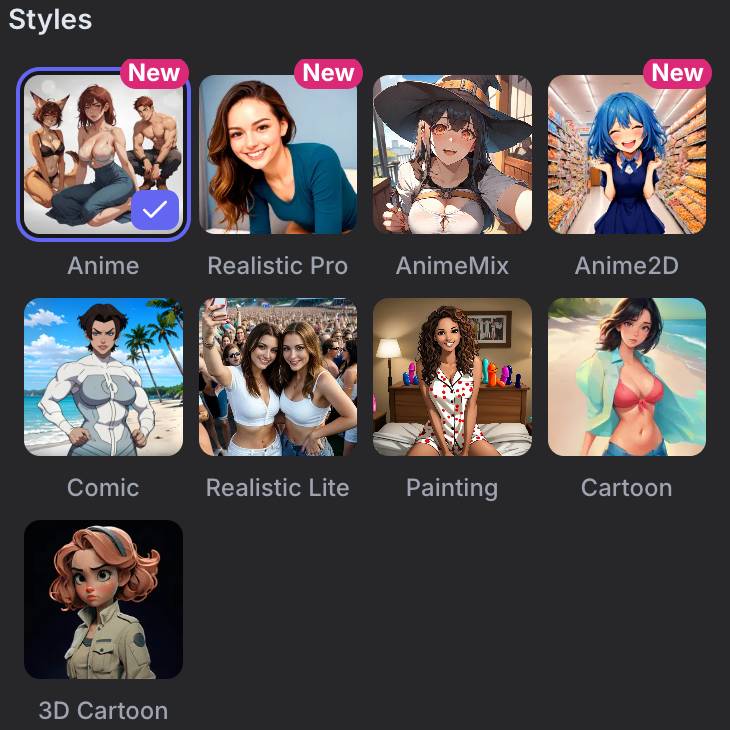
Where: Grid of style cards
Options shown: Anime (New), Realistic Pro (New), AnimeMix, Anime2D (New), Comic, Realistic Lite, Painting, Cartoon, 3D Cartoon.
How to pick:
- Realistic Pro / Realistic Lite: Photographic looks; Pro tends to be more detailed and contrasty, Lite softer and easier-going on faces and skin.
- Anime / AnimeMix / Anime2D / Comic / Cartoon / 3D Cartoon: Increasingly stylized looks. AnimeMix blends cute/modern anime with slight realism; 3D Cartoon suggests a rendered, toy-like finish.
- Painting: Brushy, gallery-style images.
Tip: Your prompt still matters. If you select Painting but ask for “hyper-realistic,” the engine must reconcile both—prefer clarity: match prompt to style.
4) Pick Number of Images and Creativity
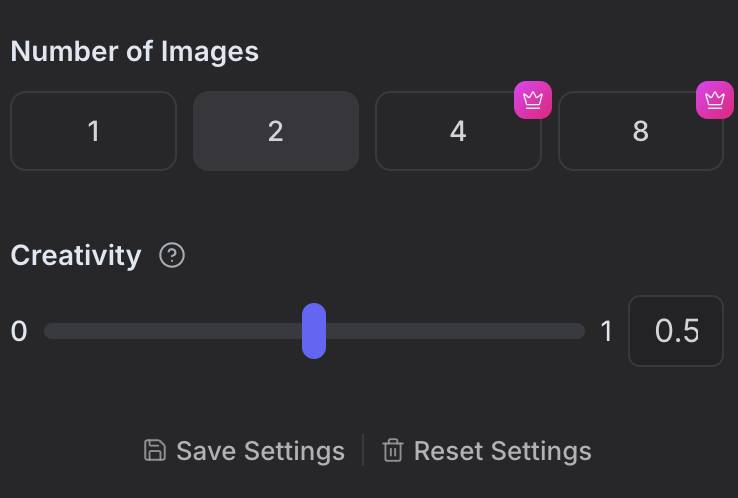
Where: Panel with “Number of Images” (1, 2, 4, 8) and a Creativity slider (0 → 1), plus Save Settings / Reset Settings
How to use:
- Number of Images: Generate multiple variations at once to compare compositions. (Some options show a crown badge—use them if available on your plan.)
- Creativity (0–1):
- 0.0–0.2: Very strict to your prompt; minimal surprises.
- 0.3–0.6 (sweet spot): Faithful but still explores better framing and details.
- 0.7–1.0: Bold reinterpretations; great for concept exploration.
- Save Settings: Store your current style/creativity/quantity for next time.
- Reset Settings: Revert to defaults if things drift.
Quick presets
- Product/brand visuals → Realistic Pro, Creativity 0.3–0.4, 2 images.
- Concept art/ideation → Painting or AnimeMix, Creativity 0.6–0.8, 4 images.
- Social post cartoons → Cartoon or 3D Cartoon, Creativity 0.5–0.7, 2–4 images.
5) Generate and Watch the Progress

Where: “Generating Images” screen with a progress bar and queue position
What you’ll see:
- A status line like “Generating image…” and “Your position in the queue: 1.”
- If you’re iterating a lot, queue position helps you gauge turnaround.
Tip: If generation stalls, lightly edit your prompt (even adding a single clarifying word) and re-run. It forces a fresh pass.
6) Review Results and Generate More
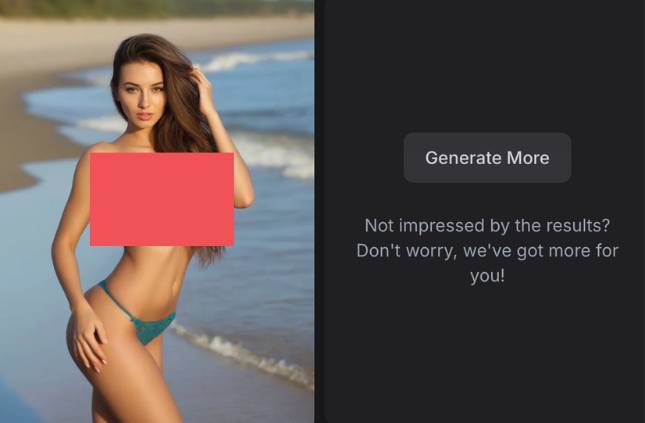
Where: Gallery/result panel with a Generate More button
What to do next:
- Evaluate each image for composition, lighting, and the details you asked for.
- If something’s off, tighten your Prompt and Negative Prompt:
- Add missing elements (e.g., “golden hour rim light, wet pavement reflections”).
- Exclude issues (e.g., “no text, no watermark, no extra fingers”).
- Click Generate More to get fresh variations using your current settings.
Iteration pattern that works
- First pass: broad prompt + chosen style (2 images, Creativity ~0.5).
- Second pass: keep the best image open, refine prompt toward what you like, add negatives for what you don’t.
- Third pass: nudge Creativity up for bolder options or down for precision; increase Number of Images for a proper A/B/C/D compare.
Prompt & Negative Prompt Cheat Sheet
- Strong structure:
Subject + action + setting + mood/lighting + lens/composition + style
“Elderly jazz musician playing sax on a rain-slicked street at night, neon reflections, cinematic backlight, 85mm portrait framing, Painting style.” - Handy negatives:
blurry, low-res, pixelated, jpeg artifacts, watermark, text, logo, extra fingers, extra limbs, disfigured, bad anatomy, cross-eye, duplicate person, oversaturated, harsh shadow - Consistency cues:
Re-use exact descriptors you liked (e.g., “soft rim light,” “overcast skylight,” “matte color grade”).
Troubleshooting
- Too generic or flat: Add setting and lighting; drop Creativity to 0.3–0.4; pick a more precise style.
- Weird anatomy/hands: Strengthen negative prompt with extra fingers, extra limbs, bad anatomy; try Realistic Lite instead of Pro or lower creativity.
- Unwanted text/logos: Add no text, no watermark, no logo to negatives.
- Too similar across outputs: Raise Creativity to 0.6–0.8 or switch styles.
- Over-processed look: Turn Auto-Enhance off and regenerate.
Good Practices & Safety
- Keep Safe Mode on for general use and any public-facing work.
- Respect privacy and copyrights; avoid using real people’s likenesses without permission.
- When in doubt, generate SFW previews first, then refine.
What you can actually do with it
It’s more than just “type a prompt, get a pic.” Think layered customization—you can guide poses, adjust lighting, swap styles (anime, hyperreal, soft-focus, etc.), and even reference previous creations to stay consistent.
| Feature | Why It Matters |
| Uncensored generation | Nothing gets filtered. Express adult fantasies freely. |
| Style control | Choose between artistic, anime, photoreal, and hybrids. |
| Advanced prompts | Get detailed—down to pose, gaze, body shape, background. |
| Companion integration | Link with chat personality for visual storytelling. |
| Batch generation | Preview multiple versions, pick your favorite. |
| Community presets (optional) | Pull from trending or custom-built templates. |
It’s like building your own visual muse—one prompt at a time.
Does it actually work though?
Tried it after a friend wouldn’t shut up about it. First prompt was clumsy—too many adjectives, not enough direction. I got a blurred, awkward pose. But then I simplified it: “tattooed woman, back arched, dim studio light, teasing smile.” And wow.
The AI nailed it. Details popped. There was heat in the shadows. It felt like the frame knew the mood I was after.
You don’t need to be a poet or a prompt engineer. Just be real about what you want. The generator figures out the rest with surprising emotional range.
Real talk: how does the uncensored part work?
Unlike mainstream AI tools that start shaking at the sight of the word “cleavage,” this one doesn’t flinch. You can push the boundaries—softcore, hardcore, romantic, risqué, surreal. Whatever your visual language, it listens and delivers.
And because it’s not public-facing content, there’s a privacy shield: no shaming, no judgment, no moderation bots scrubbing your fantasies clean.
Pricing & Access
It’s not charity—obviously. But you do get a taste for free. You can preview lower-res images, try a few prompts, and see if the vibe clicks.
| Plan | What You Get | Cost |
| Free Tier | Limited prompts, low-res images, basic tools | $0 |
| Premium Monthly | Unlimited access, HD outputs, priority rendering | ~$9.99/mo |
| Annual Plan | Same as monthly, but cheaper in the long run | ~$5.89/mo |
You’re not just buying images. You’re buying agency—the power to create what you’ve imagined but never been able to show.
Visit GPTGirlfriend Image Generator
Imperfections? Oh, absolutely.
It’s not always spot-on. Sometimes hands go haywire. Other times, poses get stiff or faces go blank. But those glitches?
Honestly, they make the wins feel even sweeter. When it works—which, more often than not, it does—you get something that feels handcrafted just for you.
Sometimes the imperfection becomes part of the story.
Why it’s worth trying
Because art—especially adult, imaginative, emotional art—shouldn’t be gatekept by algorithms built to appease ad companies.
If you’re craving more than just erotic images… if you want to feel like your fantasies matter enough to render—this generator might just become your new obsession.
My opinion?
It feels oddly intimate. Not just because of what it shows, but because of how it responds. You ask for intensity, it gives it. You ask for softness, it gives that too.
There’s a weird sort of empathy in the outputs—not because it understands you, but because you’re understanding yourself through what you create.
That’s what makes it more than just a tool. It’s a mirror.
- Uncensored AI image generator with full control over style, emotion, and subject matter.
- Generates visuals that match your fantasies—no filters, no apologies.
- Free to test, affordable to unlock.
- Not perfect, but deeply expressive when it lands.
- Ideal for adults who want to see their imagination come to life, unfiltered.
You bring the idea. The tool brings the rest. And somewhere in the middle, something personal gets made.
If you ever want help refining a prompt or exploring visual storytelling, I’ve got your back.